
When the cold months roll in, nothing feels better than walking into a warm, cozy home. A smooth furnace install is the key to making that happen. Whether you’re replacing an older system or upgrading to a more energy-efficient unit, following a reliable furnace installation checklist eliminates stress and saves money in the long run. Many homeowners jump into the project without understanding the furnace installation process, which often leads to unnecessary mistakes, avoidable safety concerns, and unexpected costs.
This guide breaks everything down in a clear, friendly, and practical way. You’ll find expert tips, safety essentials, and step-by-step insights into the residential furnace installation journey. Most importantly, the tone is simple, engaging, and easy to follow, almost like a conversation with a home comfort pro who actually cares about helping you out. And because furnace installation is a significant investment, this guide also highlights factors that affect the cost, how to prepare, and how to avoid common pitfalls. So, if you’re ready for a safe, efficient, and stress-free setup, let’s get into it.
Know What You Need Before You Begin Your Furnace Installation
Before diving into the complete furnace installation steps, it’s essential to understand what your home actually requires. Every home’s heating needs are different, and choosing the wrong system can lead to reduced comfort and high energy bills. Start by checking your home’s size, insulation quality, climate, and ductwork condition. These factors directly affect the unit’s required capacity and long-term performance.
It also helps to compare different fuel types. Gas furnaces remain the most common option due to their efficiency, while electric models are ideal for smaller homes with low heating demands. No matter which you pick, ensure the system aligns with your home’s electrical and venting setup. If you need expert guidance, checking professional resources like Ramos Heating & Cooling can point you in the right direction.
Prepare Your Home: Furnace Installation Preparation Essentials
When discussing furnace installation preparation, homeowners often skip essential details that can slow down the project. Before the technicians arrive, clear the installation area. Remove clutter, stored items, and anything else that might block the workspace. Also, measure doorways and hallways. A surprising number of installations get delayed because the unit doesn’t fit through narrow spaces.
Next, double-check your electrical panel to ensure it supports the new system. If your home is older, you may need minor upgrades. This step protects both your home and the HVAC techs, reinforcing proper safety practices during furnace installation. Remember to inspect the venting pathway as well. A clean, structurally sound vent line ensures safe combustion and prevents carbon monoxide issues.
Understand the Furnace Installation Timeline and Cost Factors
Homeowners often ask, “How long does a furnace installation take?” A typical furnace installation timeline ranges from 4 to 10 hours, depending on the job’s complexity. If ductwork upgrades or electrical modifications are needed, the process may take a little longer. Being aware of these details helps you plan your day and avoid unnecessary stress.
When it comes to the furnace installation cost, several factors come into play:
– Furnace size and efficiency rating
– Labor and technician expertise
– Ductwork repairs or modifications
– Electrical or gas line adjustments
– Thermostat upgrades
– Regional pricing differences
A professional service like this can provide an accurate estimate based on your home’s specific needs. Investing in quality installation pays off in long-term reliability and reduced energy bills.
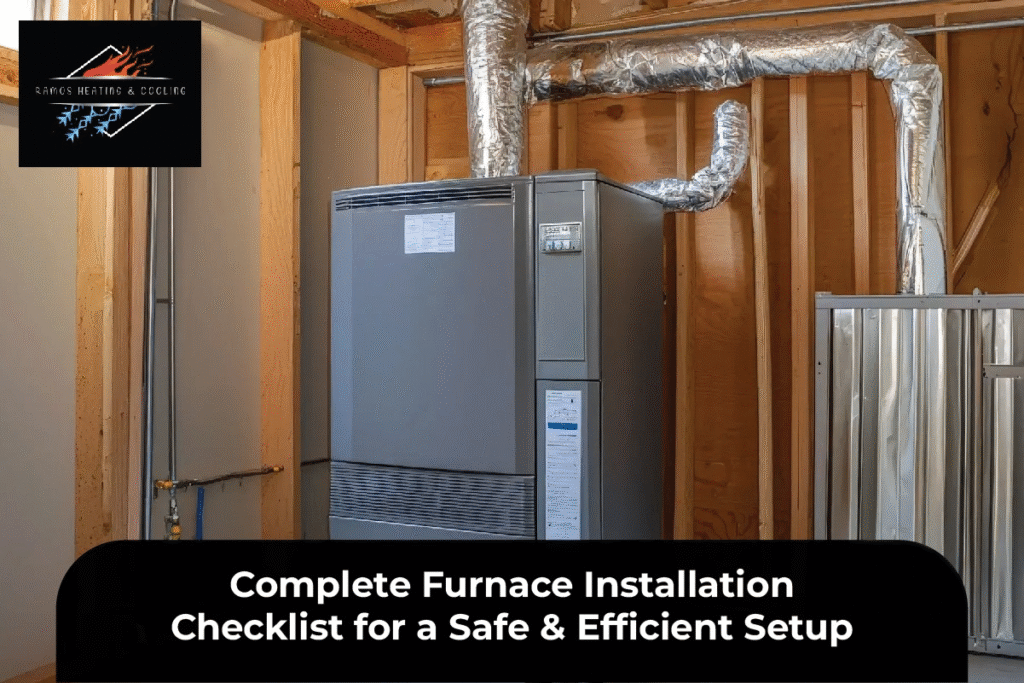
Follow the Furnace Installation Steps for a Smooth Setup
Understanding the furnace installation steps helps homeowners feel more confident and informed during the process. First, the old furnace is safely disconnected and removed. This step includes gas shutoff, electrical disconnect, and vent line separation. Technicians follow strict safety protocols to avoid leaks or damage.
Second, the new system is positioned and leveled. Proper leveling ensures quieter operation and extends the system’s lifespan. After that, the team connects the gas lines, electrical wiring, condensate drain, and venting components. The accuracy of these steps determines how efficiently your furnace runs. Finally, the unit is thoroughly tested to ensure proper airflow, temperature control, and overall system performance.
Safety First: What You Must Know for Furnace Installation Safety
No installation guide would be complete without covering furnace installation safety. Even though the professionals handle the technical side, homeowners should still understand the basics. Always make sure your carbon monoxide detectors are working. If you don’t have them, install a few before the furnace is on for the first time.
Additionally, keep flammable materials, like paint, cardboard boxes, and chemicals, away from the furnace area. Proper clearance is essential for fire prevention. Regular maintenance checks also play a significant role in keeping your system safe. A reliable HVAC partner, such as Ramos Heating & Cooling, provides regular tune-ups and safety inspections. Learn more through their helpful blog.
After Installation: Essential Post-Setup Checks Homeowners Should Do
Once the installation is complete, homeowners should take a few moments to verify everything is working exactly as expected. Start by checking airflow from each vent. Uneven airflow might signal duct issues that need attention. Next, listen for unusual noises. While new furnaces may hum softly, banging or rattling sounds should be reported immediately.
It’s also important to understand your furnace’s new features. Whether you have a programmable or smart thermostat, take time to learn how to use it. Optimizing climate settings saves energy and enhances comfort. Finally, keep your furnace installation checklist handy. This makes future inspections easier and helps ensure your system stays in top shape throughout the year.
Maintenance Tips to Extend Your Furnace’s Life
Routine upkeep is the secret to getting the most out of your HVAC furnace installation. Start by checking the air filter every month. A dirty filter limits airflow, increases utility bills, and strains the system. Replacing it regularly ensures smoother operation and better indoor air quality.
Additionally, schedule annual professional maintenance. This includes inspecting the heat exchanger, cleaning burners, checking electrical connections, and ensuring safe ignition. Staying proactive not only reduces repair costs but also provides long-term system efficiency.
Final Thoughts
Furnace installation is a significant investment, and a thorough understanding of the process makes everything smoother, safer, and more cost-effective. By following the right furnace installation guide, preparing your home, prioritizing safety, and keeping your system maintained, you’ll enjoy reliable warmth for years to come. Whether you’re researching or ready to book professional help, this checklist keeps your installation on track.
FAQs
1. How much does a furnace installation typically cost?
The furnace installation cost varies based on size, efficiency, labor, and necessary upgrades. On average, homeowners spend between $3,000 and $7,500.
2. How long does the furnace installation process take?
Most installations take 4–10 hours. More complex jobs with duct or electrical modifications may take longer.
3. Can I install a furnace by myself?
Due to safety risks involving gas lines, electricity, and combustion, DIY furnace installation is not recommended. Always hire a licensed professional.
4. What size furnace do I need for my home
Sizing depends on square footage, insulation, climate, and duct condition. A professional load calculation ensures accurate results.
5. How often should I replace my furnace filter?
Check your filter every 30 days and replace it as needed—typically every 1–3 months.