
Installing a thermostat might sound like a complicated job best left to professionals, but here’s the truth: it’s something you can do yourself with a bit of patience and the right guide. Whether you’re upgrading to a smart thermostat, replacing an old one, or just curious about how to install a thermostat safely, this step-by-step breakdown will make the process stress-free and straightforward.
A properly installed thermostat not only helps regulate indoor comfort but also saves money on energy bills. By understanding basic thermostat wiring and setup, you can confidently take charge of your home’s climate control without calling a professional every time. Let’s walk through the 10 easy thermostat installation steps that every homeowner can handle like a pro!
1. Turn Off the Power Before You Begin
Safety first, always! Before touching any thermostat wiring or removing the old device, locate your home’s circuit breaker and shut off power to the HVAC system. This prevents electrical shocks and protects your thermostat wiring.
If your home uses a labeled breaker, look for one marked “HVAC” or “Furnace.” Once it’s off, double-check by adjusting your thermostat; your system should not turn on. Now you’re ready for a safe and smooth thermostat installation.
2. Remove the Old Thermostat Carefully
Next, remove the old thermostat faceplate by gently pulling it off the wall. Most models snap off easily, revealing the wiring underneath. Take a quick photo of the existing wires before disconnecting them. Trust me, this snapshot can save a headache later when you’re following the thermostat wiring guide.
Label each wire by its terminal (e.g., R, W, Y, G, C). These labels will match the new thermostat’s setup instructions, making your home thermostat installation a breeze.
3. Check the Wiring and Compatibility
Before installing the new thermostat, make sure your wiring and HVAC system are compatible. Smart thermostats often require a “C” or standard wire for consistent power. If your system doesn’t have one, you may need an adapter or help with professional thermostat installation.
To avoid compatibility issues, refer to the thermostat setup instructions included with your device or visit your manufacturer’s website. It’s worth verifying this step before continuing to prevent unnecessary rewiring later.
4. Mount the New Thermostat Base
Once you’ve confirmed compatibility, it’s time to install the new base plate. Align it with the wall anchors or screw holes from the old thermostat. Use a level to make sure it’s straight—no one likes a crooked thermostat!
Drill new holes if necessary, insert wall anchors, and secure the base with screws. Feed the wires through the center opening before tightening everything up. Proper mounting ensures your thermostat installation goes smoothly and looks professionally done.
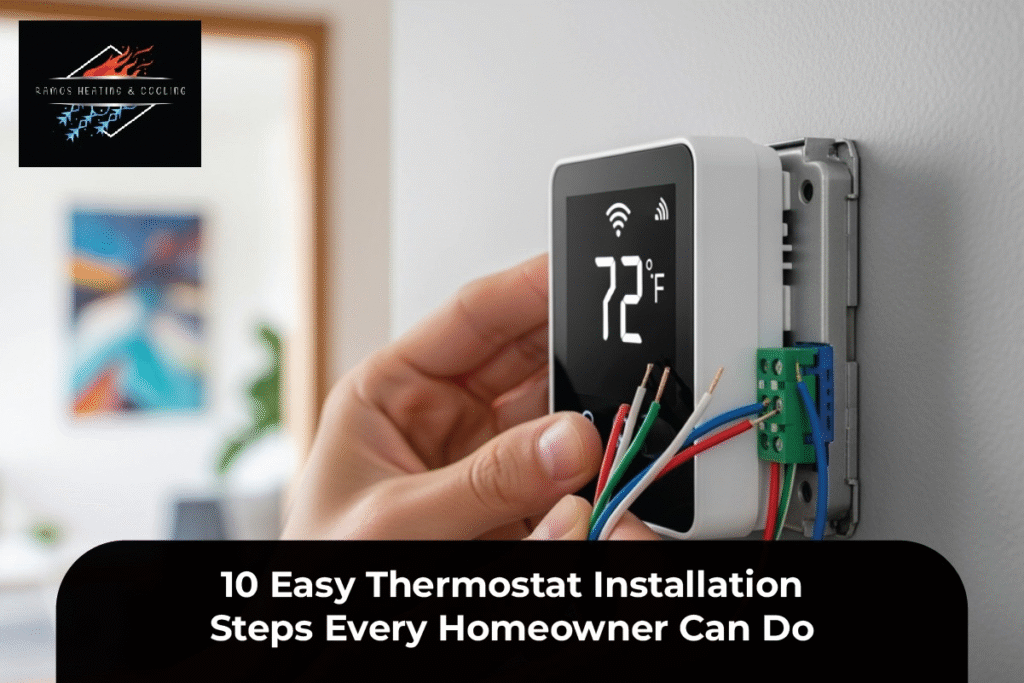
5. Connect the Wires Correctly
Now comes the fun part: connecting the wires. Match each labeled wire to the correct terminal on the new thermostat. Common labels include:
- R (Power)
- C (Common)
- W (Heat)
- Y (Cooling)
- G (Fan)
If you’re installing a programmable or smart thermostat, follow the thermostat wiring guide provided in the manual. Make sure each wire is firmly seated in its connector. Loose wiring can cause your HVAC system to malfunction or fail to power the thermostat.
6. Attach the Thermostat Faceplate
Once the wiring is secure, gently attach the new faceplate to the mounted base. You’ll usually hear a satisfying click when it locks into place.
Modern thermostats, with their advanced installation options, often include built-in sensors and Wi-Fi connectivity, so be sure to handle the device with care. Ensure it’s properly aligned and sits flush against the wall for a polished, professional look.
7. Restore Power and Test the System
Head back to your circuit breaker and turn the power back on. If everything was wired correctly, your new thermostat should light up or display a startup screen. Follow the on-screen thermostat setup instructions to complete the installation.
Adjust the temperature settings to test both heating and cooling functions. If your HVAC doesn’t respond, double-check your wiring connections or consult an expert for professional thermostat installation help.
8. Configure Wi-Fi and Smart Settings
If you’ve installed a smart thermostat, connect it to your home Wi-Fi network. This enables app-based controls, voice commands, and energy-saving features.
Most smart thermostats offer learning modes that automatically adjust to your habits over time, making your install thermostat DIY project even more rewarding. You’ll gain access to real-time energy tracking, remote control, and scheduling options that can significantly cut your energy bills.
9. Program Your Temperature Schedule
For programmable thermostat installation, take advantage of scheduling features. You can set different temperatures for mornings, evenings, and weekends, no more wasting energy when no one’s home.
Creating a temperature routine not only enhances comfort but also reduces energy costs. This small but crucial step in your home thermostat installation ensures maximum efficiency year-round.
10. Maintain and Monitor Performance
Congrats—you’ve completed your thermostat installation! But don’t stop there. Regularly check for system updates, dust around the thermostat, and battery levels (if applicable).
If your thermostat starts acting up or your HVAC system behaves oddly, it might be time for a quick recalibration or even an HVAC thermostat replacement. For ongoing care, you can always consult trusted local experts like Ramos Heating & Cooling for routine maintenance or advanced thermostat installation in Brown Deer—especially for complex intelligent systems.
They also share expert advice on their blog, the Thermostat Installation Guide Blog, which helps homeowners maintain HVAC efficiency.
Final Thoughts: Small Upgrade, Big Difference
Installing a thermostat might seem intimidating at first, but with the proper steps and patience, you can confidently manage it yourself. Not only does it boost your comfort, but it also gives you greater control over your home’s energy usage and HVAC performance.
Whether you’re taking the DIY route or hiring a professional to install a thermostat, understanding the basics helps you make informed decisions. So go ahead, follow these 10 easy steps to install a thermostat and enjoy a smarter, more energy-efficient home today!
FAQs About Thermostat Installation
1. How long does it take to install a thermostat?
Typically, DIY thermostat installation takes about 30–60 minutes, depending on your experience and the type of system.
2. Can I install a smart thermostat myself?
Yes, most smart thermostats include user-friendly setup instructions. However, if you lack a C-wire, you may need a technician’s help.
3. Do I need to turn off the power before replacing a thermostat?
Absolutely. Always turn off the power at the circuit breaker to avoid electrical hazards.
4. What tools are needed to install a thermostat?
You’ll need a screwdriver, level, drill, wire labels, and your new thermostat kit.
5. Can a thermostat work without Wi-Fi?
Yes, non-smart and programmable thermostats work without Wi-Fi, though innovative features require internet connectivity.